An oiled dining table can look uneven after dinner even when it is reasonably clean. A damp plate, a greasy serving dish and a frequently touched edge leave different marks. Adding maintenance oil to all of them is tempting, but oil applied over food residue can complicate the next cleanup. Begin with the spill and the named finish system, then decide whether any renewal is justified.
This guide concerns everyday care of an identified oil-treated wooden dining tabletop. Hardwax oils, soap finishes and film coatings can have different instructions. The word natural on a bottle is not evidence of compatibility, and a dry-looking patch does not prove that the wood needs another coat.
Recover the actual finish instructions
Find the table's product code and the oil supplied or recommended for it. Record whether a previous owner changed the finish. If a receipt simply says oak dining table, ask the supplier for the finish specification. Keep a photograph of the care label with the household maintenance notes so someone else does not substitute furniture polish.
Carl Hansen & Son's solid-table guidance separates routine wiping from oil treatment and gives specific directions for its own care kit. Those directions establish that renewal is a separate operation; their timing and sanding instructions should not be copied onto an unrelated table. AICCM also emphasizes the complexity of finished furniture. If the coating is unknown, remove loose crumbs gently and resolve identification before wet cleaning or adding oil.
Deal with dinner soil in order
Lift plates and mats rather than sliding their trapped grit across the top. Pick up solid food with a soft utensil or cloth without scraping the wood. Blot a fresh liquid spill immediately, working inward so it does not spread over the table edge. Attend to end grain and joints, where a puddle can remain unnoticed.
Keep grease, pigment and water observations separate. A translucent smear following a serving bowl may be removable food residue; a dark patch that persists after drying may need finish-specific advice. Do not spread a stain by wiping the whole top with its first dirty cloth. Change to a fresh face frequently, especially after collecting oily food. A clean cloth is part of the method, not merely a final polishing accessory.
Clean with the authorized minimum moisture
Where the maker permits water wiping, prepare a soft cloth away from the table and wring it well. Work in the grain direction with modest pressure. Follow the specific instructions about soap or detergent: some oil systems allow a particular soap, whereas the cited Carl Hansen tabletop guidance tells owners to avoid detergents and chemicals for routine cleaning.
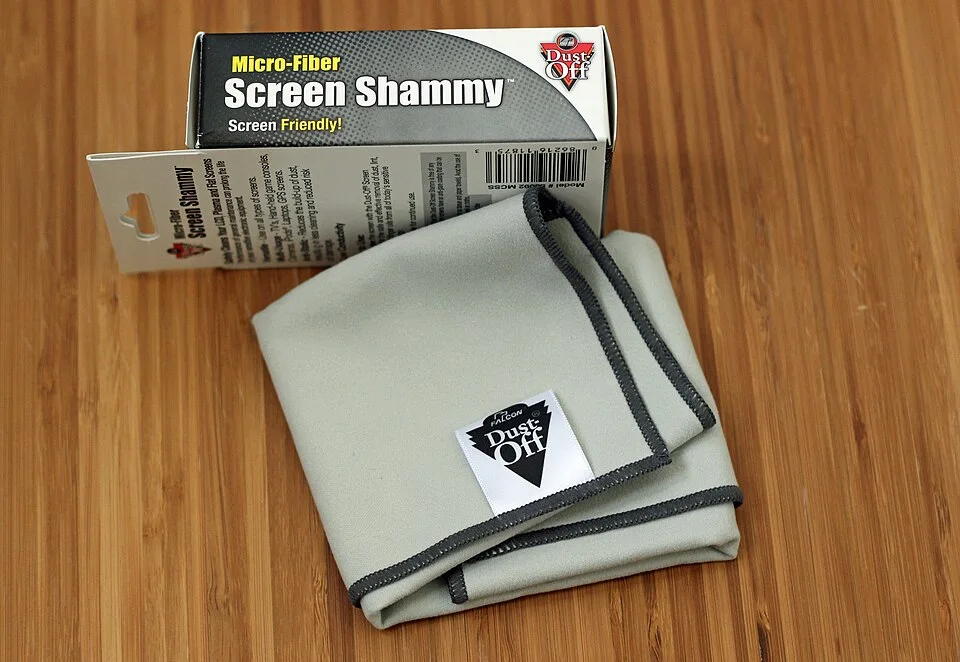
The stitched hem and folded faces are exposed for checking trapped grit, snagging or residues before contact with the tabletop. Prepare your own clean soft cloth away from the wood and use only the moisture level authorized for its identified oil system. This packaged screen cloth does not establish furniture compatibility or demonstrate a dampness level.
Photo & usage
HelenOnline · Public domain · Source. Display copies resized and encoded as WebP; no instructional details were fabricated or removed.
Finish as directed with a clean cloth and allow the surface to dry. Do not leave a wet mat over the cleaned area to soften a stubborn mark. Avoid steam and concentrated kitchen degreasers unless the exact finish supplier explicitly authorizes a method. Cleaning permission for a tiled backsplash beside the table does not extend to the wood beneath the spray.
Judge the dry surface before reaching for oil
Look across the table after the dampness has gone. Run a clean fingertip lightly over an intact area only if the maker permits normal handling. Food tackiness, a gritty deposit and an even matte oil finish are different observations. A naturally low sheen is not a defect requiring a gloss product.
A patch that becomes darker when damp but lightens again as it dries has changed appearance with moisture; that observation alone does not identify a loss of oil. Equally, water beading is not a universal certificate of adequate protection. Compare with the table's documented original appearance and the supplier's maintenance criteria. Persistent roughness, open joints, raised grain or deep darkening calls for a more specific assessment before renewal.
Plan a renewal as its own small project
Once the table is clean and fully dry, check the named oil's application, preparation, ventilation and curing instructions. Ask whether the whole top requires treatment to avoid overlap marks. Protect nearby textiles and flooring before opening the product. Do not sand veneer or unknown construction because a solid-table guide discusses sanding.
Read the disposal instructions for oil-wet cloths before beginning. Drying oils can create a combustion hazard in bunched rags; follow the product label and local disposal requirements rather than leaving them in a pile. Prepare the permitted handling arrangement first. If the table is needed for dinner that evening, delay renewal unless the full stated drying and curing schedule can be respected. Touch-dry and ready for a tablecloth are not necessarily the same condition.
Work through an illustrative timing case
Suppose, purely illustratively, a compatible oil label requires 24 hours before light use and 72 hours before covering. An application finished at 10 a.m. on Monday reaches those points at 10 a.m. Tuesday and 10 a.m. Thursday. The covering restriction continues for 48 hours after the earliest light-use point: 72 minus 24 equals 48.
These invented durations are not recommendations for any oil brand. They show why a calendar entry reading table dry tomorrow is incomplete. Copy the actual label's separate limits into the household schedule. Temperature, application amount and product conditions may affect drying, so the elapsed time never overrides a surface that remains tacky. If the label is unclear, ask the supplier before setting dishes or a protective cover on the top.
Recognize common errors early
Sticky bands after maintenance can reflect excess product or incomplete drying rather than inadequate oil. Adding another coat usually increases uncertainty. Stop using the table and ask the finish supplier how to correct the specific product. Keep its batch details and the application history. Do not scrub the sticky area with an unrelated solvent to speed the job.
Likewise, a blackened joint, a lifting repair or a cup ring that survives ordinary cleaning is not automatically an oil shortage. Describe its location and history. Use trivets for hot items and coasters compatible with the finish. Avoid leaving nonbreathable covers or wet place settings on the top after meals. Move decorative objects periodically where the maker recommends it, understanding that daylight-related color differences are not ordinary dirt.
Check the underside of mats and serving supports
A clean upper face can be rewetted as soon as a damp placemat returns. Before replacing table accessories, inspect their underside for condensation, food and trapped crumbs. Clean each accessory under its own instructions, then return it only in a condition compatible with the table finish. Do not assume cork, rubber or felt is harmless solely because it feels soft.
If a mark corresponds exactly to one support, record that match and stop using the support while asking about compatibility. A circular pale patch under a mat and a dark splash at an open joint do not ask the same renewal question. Store the table's care note where meals are cleared so the person wiping down knows which support caused the recurring mark. That specific use change can prevent repeating an unsuccessful cleaning-and-oiling cycle without promising that an existing defect will disappear.
Set a clear end to the daily routine
Daily cleanup is finished when crumbs and removable food residue are gone, joints are dry and the surface feels as it normally does. Record an unresolved mark rather than escalating the cleaner each evening. Keep routine wiping supplies separate from the renewal kit so that oil is not used as a cleaning shortcut.
At the next scheduled inspection, compare photographs taken under similar light and review the finish supplier's criteria. Re-oil because the identified system and condition call for it, with a realistic curing window. That creates a repeatable care routine: prompt spill attention, compatible cleaning, a dry inspection and a separately planned renewal when needed.
THE REFERENCE FILE
Sources & scope
Documentation reviewed 1 Nov 2026. Examples are illustrative; this article does not claim hands-on product testing. Follow the instructions for your actual material, model and location.