A cloudy patch on a lacquered sideboard invites more wiping because it resembles a smear. Yet a cloudy film can also sit within the finish. Cleaning that removes fingerprints will not necessarily repair heat damage, moisture whitening or worn lacquer. The practical job is to remove ordinary soil once, inspect the dry result and decide whether the remaining mark belongs to cleaning or repair.
Use this approach for an identified, intact lacquer finish on household furniture. It does not identify a coating by appearance, and it does not authorize solvent experiments on an antique. Keep the furniture maker's instructions beside the cleaning cloths, particularly for high gloss, tinted or recently refinished pieces.
Establish what the coating can tolerate
Look for a purchase record, maker's label or refinisher's invoice. The wood species tells you little about the exposed film: oak can carry oil, wax, lacquer or another coating. Record the coating and any later polish applied. A cabinet that has received silicone polish for years may present a residue problem different from an untreated new table.
Carl Hansen & Son's wooden-furniture guidance cautions against harsh agents and large quantities of liquid. AICCM's conservation advice favors gentle dry dust removal and attention to each component. Those are useful starting boundaries; the product's own care sheet decides whether damp cleaning is permitted. If the finish is unidentified, stick to careful dry dusting while requesting advice.
Read the mark before touching it
Clear the top by lifting objects rather than dragging them. Look in diffuse daylight and then from a shallow angle. Photograph the mark with a recognizable edge of the furniture in view. Fingerprints often follow hand contact near a handle; a ring following a mug has a different history. Neither pattern alone establishes chemical damage.
Check for cracks, lifting edges, soft patches or a finish that catches the cloth. These conditions end the routine cleaning attempt. A cloudy area beside a hot appliance is worth reporting with its history. Do not create a new diagnostic mark with alcohol, nail polish remover, a hot iron or a scratch at the back. A successful hidden solvent test could still damage the visible finish.
Prepare a wipe that cannot flood the joints
Choose soft, clean, undyed cloths and inspect them for grit. Keep one for dust, one for the permitted damp method and one dry. Remove rings or watches that could touch the top. Work away from drawer openings, hinges and exposed end grain until the main panel is understood.
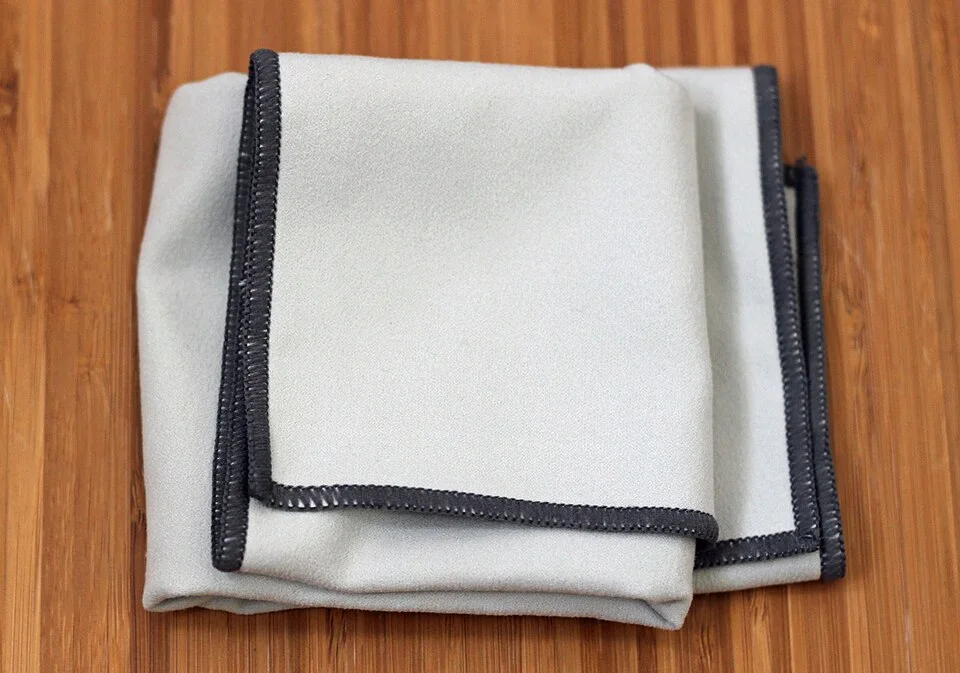
The folded faces and overlocked edges show where to inspect a cloth before it reaches lacquered wood. Choose a clean soft cloth allowed by your finish supplier, check for grit, and prepare any permitted damp wipe away from furniture joints. The pictured cloth does not demonstrate wringing, a safe moisture level or a compatible cleaning product.
Photo & usage
HelenOnline · CC BY-SA 3.0 · Source. Display copies resized and encoded as WebP; no instructional details were fabricated or removed.
Dust lightly, lifting particles rather than pressing them around. Where the maker permits damp wiping, wet the cloth away from the cabinet and wring it thoroughly. It should leave a brief damp trace rather than droplets. Apply any approved cleaner to the cloth as instructed, not indiscriminately into seams. A cleaner suitable for glass doors may be unsuitable for their lacquered frame.
Make one controlled cleaning comparison
Choose an inconspicuous but representative intact area. Clean using the authorized method, finish with a separate dry cloth if directed and wait for the area to dry fully. Judge from the original position. If new haze, color transfer, tackiness or increased drag appears, stop and preserve the product details for the maker.
If the trial is unchanged or cleaner without damage, extend the same method to the marked area. Use light overlapping passes with a clean face of the cloth. Do not keep working a patch simply because it is visible while wet. Water can temporarily alter reflections, making a defect appear cured until the surface dries. The meaningful result is the stable dry appearance, not the first glossy wet photograph.
Compare residue with a persistent finish change
| Observation after drying | Working interpretation | Next action |
|---|---|---|
| Fingerprint edge disappears; surrounding sheen matches | Removable contact soil was present | Finish the same gentle method |
| Broad ring remains in exactly the same outline | A finish alteration is possible | Stop repeated cleaning and ask about repair |
| Cloth leaves fresh streaks over previously clear wood | Residue or a dirty cloth may be involved | Check instructions and cloth cleanliness |
| Color transfers or coating becomes sticky | The method may be affecting the coating | Stop immediately |
Imagine, illustratively, a top divided into four equal observation areas. Three lose their fingerprints after one permitted pass, while the fourth retains a white ring. Three out of four is 75 percent, but it does not mean the remaining area needs 25 percent more cleaner. It means the observations differ. The useful record is the unchanged outline, not a percentage claim about cleaning effectiveness.
Avoid polishing over an unresolved patch
Furniture polish can temporarily alter reflection and conceal the comparison you just made. Wax adds another layer with its own removal requirements. Oil intended for bare or oiled wood should not be applied merely because a lacquered top looks dry. Ethan Allen's use-and-care guide distinguishes routine care from damage needing a furniture specialist; it is not a license to restore every coating with one product.
Avoid abrasive pads, powdered cleaners and vigorous buffing at the ring. A localized glossy or dull island can be harder to blend than the original cloud. If a previously applied product is suspected, give the maker its name and approximate application history. Do not combine a degreaser with a polish stripper to see which works. Preserving the current finish is more valuable than completing an improvised experiment.
Check glass panels and handle surrounds independently
A lacquered cabinet with glazed doors has at least two exposed surfaces even when the whole piece is sold as one item. Before cleaning the glass, decide how its cleaner will be kept off the lacquered surround. Prepare the permitted glass method on its own cloth away from the cabinet, and keep that cloth distinct from the one used on wood. Do not assume a fine mist will stay within the glass boundary.
Look at the handle recess after cleaning the panel. A dark arc there may be accumulated contact soil, a reflection from the handle or wear where fingers repeatedly touch the coating. Compare it with the broad face only after both are dry. If the handle itself needs metal polish, protect the lacquer using an approved arrangement or ask about safe hardware removal; polish residue on the door would create another problem.
For a cloudy shelf beneath a glass display, also record whether the apparent patch lies on the shelf finish or on the glass above it. A side-angle observation can locate the reflection without introducing new chemistry. Cleaning the wrong layer repeatedly cannot answer the mark. Keep the cabinet in its normal stable position and avoid dismantling shelves to investigate an uncertain reflection.
Finish with a use and repair decision
Inspect the top when fully dry and under ordinary room lighting. The cloth should leave no lint or residue, handles should be dry, and no liquid should remain in joints. Open a cleaned drawer only as needed to check that its upper edge has not been left damp; do not dismantle hardware. Replace objects only after the maker's stated drying requirement is met.
For a persistent mark, send a repairer the coating information, photographs, spill or heat history and the exact cleaner used. Ask whether the defect sits in the film and whether localized treatment will match the surrounding sheen. While awaiting advice, use suitable coasters and trivets and lift objects during dusting. The cleaning is complete when removable soil is gone and the surface is stable, even if a separate finish repair remains.
THE REFERENCE FILE
Sources & scope
Documentation reviewed 1 Nov 2026. Examples are illustrative; this article does not claim hands-on product testing. Follow the instructions for your actual material, model and location.