Owning several mop pads does not guarantee that one is ready when the floor needs attention. Some may be dirty, others still damp, and one may be hidden on the mop head inside a cupboard. Make the rotation visible by giving each pad a clear status. Then plan care around the pad's actual instructions and the household's observed drying conditions.
Identify the pads before combining their care
Check each pad or refill for its product identifier and care instructions. Different materials and backing systems may require different washing and drying methods. Separate unfamiliar third-party replacements from the original refills until their instructions are known. Fitting the same mop does not establish identical care.

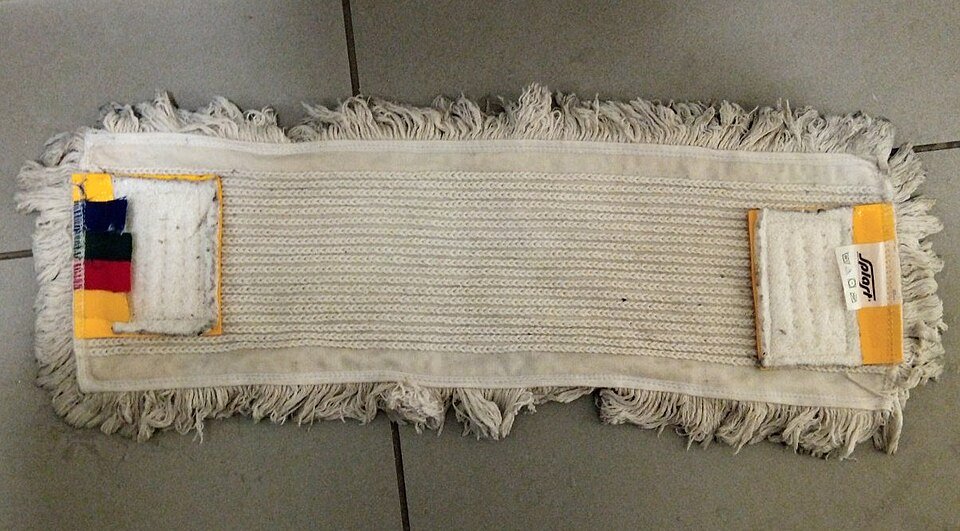
The separate pads expose their backing pockets, binding and sewn tag, useful places to look when identifying a refill. Match your own product identifier to its maker’s washing and drying directions before combining pads. Similar size or a matching mop connection does not establish identical care, bleach permission or drying limits.
Photo & usage
Azarmop · CC BY-SA 4.0 · Source. Display copies resized and encoded as WebP; no instructional details were fabricated or removed.
O-Cedar's microfiber refill guidance specifies warm hand or machine washing, no bleach or fabric softener, and flat or hanging drying. Apply those directions only to the products covered by that guidance. Another pad may have a different limit, especially when it contains adhesive, a foam layer or a special attachment backing.
Inspect pads for torn edges, detached fasteners and embedded grit. A pad with a hard particle can scratch a floor regardless of how recently it was washed. Keep damaged or gritty pads out of the ready group while you decide whether permitted cleaning can restore them or replacement is needed.
Give the rotation three visible states
Create distinct places for used, drying and ready pads. A small labelled system is enough; it does not require a new storage unit. Choose the used-pad position so wet items are not compressed against clean supplies, and use a washable container appropriate to the material and product instructions.
The drying position needs exposure and support suited to the refill. Do not hang a pad in a tight fold if its backing remains wet inside. Keep it away from food preparation, electrical equipment and clean towels. Make sure drips cannot damage the floor or surface beneath it.
The ready position is for fully dry, clean, inspected pads. Do not let “washed” become a fourth ambiguous status that people interpret differently. If the item is still damp, it stays in drying. A pad left on a mop can conceal its underside, so remove it after use where the care instructions permit.
Close the floor-cleaning session properly
Before removing a used refill, finish the floor's own care steps and keep people clear of wet areas. Detach the pad according to the mop instructions without pulling on fragile fasteners. Pick out accessible debris using a permitted method and place the pad in its care route promptly.
- Identify the used pad and its care instructions.
- Remove loose debris without scattering it onto the clean floor.
- Wash by the permitted method.
- Place the pad in the drying position with folds opened appropriately.
- Move it to ready only after a complete inspection.
Do not store a dirty wet refill attached to the handle because it will be used again tomorrow. The next session should begin with a genuinely ready pad, not a decision about yesterday's unfinished tool. If care cannot be completed immediately, keep the status visible and follow the manufacturer's interim handling advice.
Work through a rotation-count example
All quantities below are illustrative and invented. Suppose the household owns six pads. Two are clean and fully dry, two are drying, one is used, and one has damaged attachment material. The available count is two, not six. If the next planned session needs three clean pads for separate zones, there is a shortfall of one.
| Status | Count | Available now? |
|---|---|---|
| Ready | 2 | Yes |
| Drying | 2 | No |
| Used | 1 | No |
| Damaged | 1 | No |
The arithmetic is 2 + 2 + 1 + 1 = 6 owned pads, with 3 − 2 = 1 additional ready pad needed for the assumed session. These counts are not a recommendation to use exactly three pads per home. They show how status, rather than purchase quantity, sets availability. Wait for a properly dried pad or adjust the session safely instead of relabelling a damp one ready.
Wash without coating the working fibres
Follow the refill's instructions and use a detergent compatible with that route. Measure rather than pouring an arbitrary extra amount because the pad looks dirty. Keep heavily soiled pads out of a delicate garment load, and consider soil, colour and attachment materials when grouping washable tools.
O-Cedar's microfiber article explains that fabric softener can coat fibres and bleach can degrade its microfiber products. Do not treat a perfumed or softer-feeling pad as necessarily better cared for. Product-specific restrictions remain relevant even when another household textile tolerates the same additive.
If grit remains after washing, inspect the working surface again before drying and reuse. A clean-looking colour change does not establish that every hard particle is gone. Do not scrape a delicate backing with a sharp tool to rescue it. When a pad cannot be restored within its instructions, replacement is a clearer decision than returning it to ready with a warning nobody will remember.
Inspect the least exposed part before release
Check seams, attachment strips and dense corners, not only the broad face. Turn the pad as permitted and look for a damp fold or backing. Use the permitted drying method for as long as needed; do not assume a universal overnight interval works in every room.
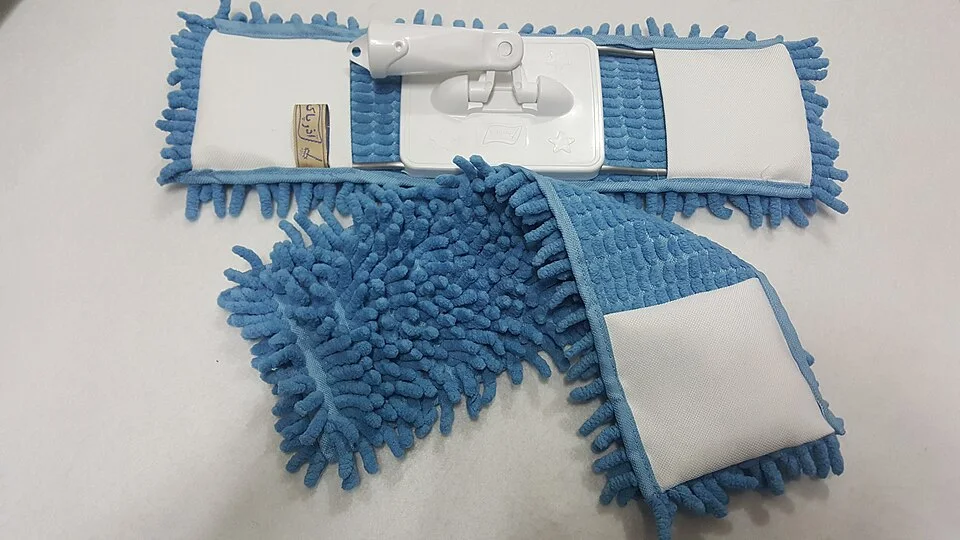
The folded pad exposes thick chenille edges, attachment pockets and backing areas that deserve a separate check after drying. Open only the folds and fittings the maker permits, then inspect those sheltered zones as well as the broad face. The photograph shows construction details; it cannot establish dryness or a universal drying interval.
Photo & usage
Azarmop · CC BY-SA 4.0 · Source. Display copies resized and encoded as WebP; no instructional details were fabricated or removed.
Compare the pad with a known dry one of the same construction if available. Touch alone has limits, especially when material feels cool. Combine that observation with visible dampness, the drying position and the condition of hidden edges. If uncertain, keep the pad drying rather than pressing it onto the mop.
Look for persistent odour, detached fibres or a backing that no longer grips properly. These can require further care or replacement, but smell alone cannot identify a specific cause. Record the concrete fault. “Hook strip detaches at one corner” gives the next person a usable decision; “old pad” does not.
Observe the drying bottleneck before buying spares
Over several ordinary sessions, note which part of a refill remains damp last and how it was positioned. A dense backing left against a wall may dry differently from the same pad laid out by its permitted method. Record the position and observation without turning them into a universal drying-time claim.
First correct avoidable folding or crowding within the manufacturer’s instructions. Then reassess whether the ready count still falls short when needed. If it does, an additional compatible refill may be practical. Keep purchasing separate from declaring an old pad serviceable: a worn attachment or trapped grit still needs its own decision. The rotation should make genuine readiness visible, not provide enough spare pads that unfinished care disappears into a larger pile.
Keep the rotation small and honest
After several normal sessions, note whether the household repeatedly runs out of ready pads. First check the process: pads may be left used, hung in folds or stored before drying. Resolve those bottlenecks before assuming that buying more is the only answer.
If an additional refill would help, choose one compatible with the mop and its care route. Keep its instructions with the existing record. Retire damaged pads clearly so they do not drift back into the floor-cleaning group, and avoid repurposing a gritty pad onto another delicate surface.
The system is complete when every pad has a visible status and the next session's ready count is known. Clean tools return to dry storage, used tools enter care, and drying tools remain exposed appropriately. That simple distinction makes the floor routine easier to begin and easier to finish.
THE REFERENCE FILE
Sources & scope
Documentation reviewed 1 Nov 2026. Examples are illustrative; this article does not claim hands-on product testing. Follow the instructions for your actual material, model and location.