Epoxy grout is often chosen for stain resistance, but resistant does not mean that no residue can remain on its surface. A greasy line may be ordinary cooking soil; a shiny film left after installation may be epoxy haze. Acid cleaners intended for cement residue are not an automatic solution to either. Identify the grout and the timing before choosing a product.
This guide concerns the cleaning decision around epoxy-grouted tile, especially a backsplash or wall. It is not an epoxy installation tutorial. The precise grout formulation, tile finish and surrounding materials govern both routine maintenance and any residue-removal process. A familiar brand name is insufficient if the actual product cannot be confirmed.
Establish the grout product and installation date
Ask the installer for the product name, color, batch details if available and the date grouting finished. Epoxy, ready-to-use and cement-based grouts are distinct categories. MAPEI's FAQs explain that epoxy grouts require different handling and can leave stubborn residue. LATICRETE's epoxy FAQs supply product-family information, while individual data sheets decide the relevant curing and cleaning conditions.
Record when normal washing, chemical exposure and wet service were permitted for this installation. Those limits are not necessarily identical. A surface that is firm enough to touch may still have restrictions. Do not borrow a cure period from another epoxy range. If the grout is newly installed and the handover paperwork is missing, contact the installer promptly while the original products and timing remain easy to recover.
Decide whether the film is old or new
Ask whether the appearance existed before the room was used. Haze present at handover suggests an installation-residue question. A sticky patch developing behind cooking equipment after months of use suggests later soil. Neither history alone proves the chemistry, but it narrows the first useful question.
Look across the dry tile in side light. Note glossy smears, cloudy swirls and a coating that bridges grout and tile face. Photograph an overall view and a close comparison with an unaffected tile. Do not scratch the film with a metal blade to prove it is epoxy. A scratched polished tile can add another permanent problem before the residue has even been identified.
Separate routine maintenance from haze removal
For ordinary soil on fully cured grout, obtain a cleaner approved for both the grout and tile. Follow the product's dilution, dwell, agitation and residue-removal instructions. Make a small complete trial in an inconspicuous representative area and wait for the dry result. Confirm that the joint remains firm and the tile's sheen unchanged.
A specialist epoxy haze remover is a different product with a different purpose. MAPEI's haze guidance distinguishes epoxy from cement and ready-mixed residue, and stresses the importance of permitted timing and surface compatibility. Do not use a haze remover every week simply because the grout is epoxy. Conversely, repeated routine detergent washes may not answer an established cured-resin problem. Keep the two jobs documented separately.
Check the tile and surrounding materials
A product compatible with epoxy grout can still be unsuitable for polished stone, decorative metal, a sensitive glaze, painted trim or the counter below. List everything the cleaner could contact, including runoff paths. Ask both the grout and tile suppliers to resolve conflicting restrictions before proceeding.
Cover or relocate nearby items using a protection method appropriate to their finishes. Keep liquids away from electrical outlets and open construction joints. If the installation includes natural stone, state that explicitly when requesting a residue method. Do not assume a product called tile cleaner treats every material classified as tile. A small test on a plain ceramic spare cannot represent an installed metallic border or repaired stone detail.
Carry out only the authorized sequence
Read the entire selected product label before opening it, including ventilation, protection and disposal requirements. Prepare the tools and clean-water removal stage in advance. Work on a section small enough to complete within the instructed contact window. Use only the permitted brush or pad; color alone does not reliably identify an abrasive grade.
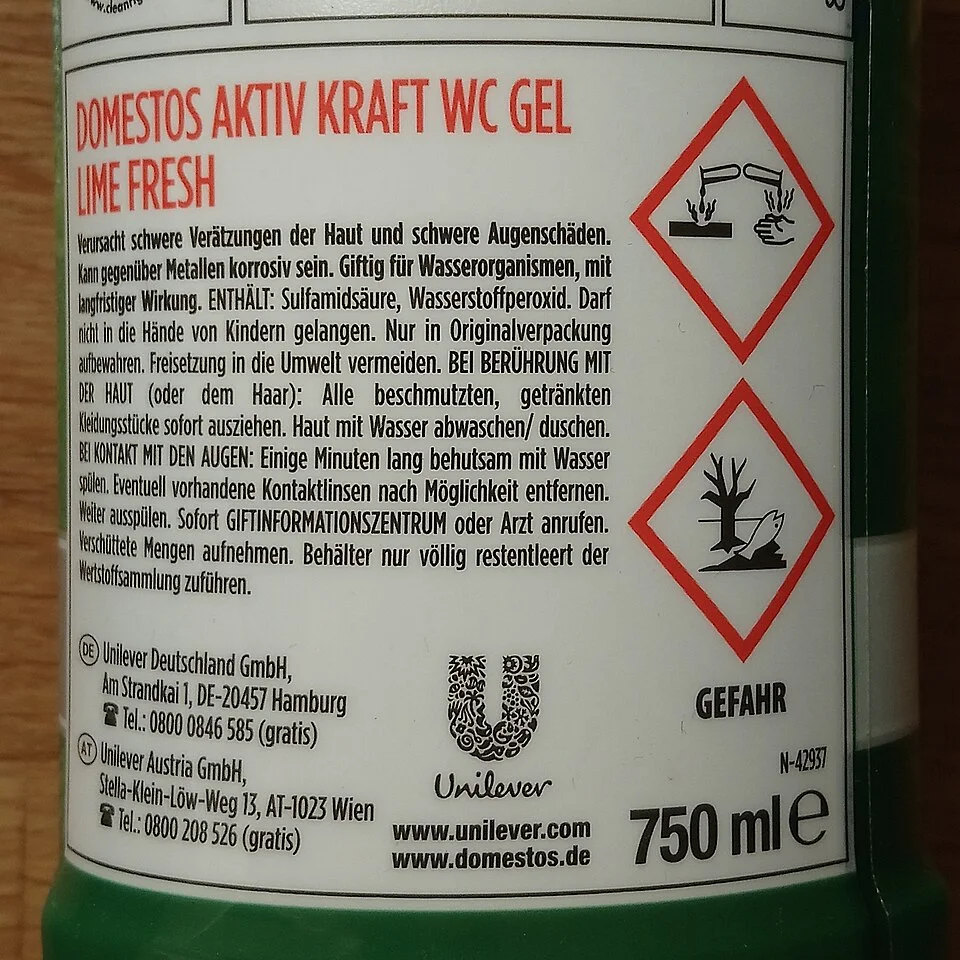
The bottle label visibly groups warning text with corrosion and environmental-hazard pictograms, illustrating why the full product label must be read before contact. For epoxy residue, first confirm the exact grout, tile finish and an authorised remover, then follow that remover’s protection, contact and removal instructions. This toilet-cleaner photograph is a label-reading reference only; it does not depict an approved epoxy remover or authorise using the pictured product.
Photo & usage
KondratiukM · CC BY-SA 4.0 · Source. Display copies resized and encoded as WebP; no instructional details were fabricated or removed.
Collect loosened residue rather than pushing it into joints or down the wall. Complete the specified rinsing and removal. Do not let solution dry contrary to the label while moving on to another section. If the product produces no improvement under the allowed conditions, stop and report that result. Longer contact, extra heat and a stronger concentration are changes to the method, not harmless repetitions.
Use a comparison that preserves the evidence
| History and appearance | Result of authorized routine cleaning | Next question |
|---|---|---|
| Sticky film appeared after cooking | Film removed; tile and grout unchanged | Can the same routine manage future soil? |
| Glossy swirls present since installation | Swirls remain | Does the installer identify epoxy haze? |
| Cloudy band after a new cleaner | No ordinary soil transfer | Is there cleaner residue or finish change? |
| Soft or missing joint material | Condition remains | Does the grout need repair assessment? |
These are invented examples rather than measured test results. They show why appearance and timing need to be recorded together. If an earlier attempt used an acid, solvent or abrasive, include it. A supplier cannot evaluate the current condition accurately when the cleaning history is hidden behind the phrase stubborn haze.
Plan time with the actual product limits
Imagine an illustrative authorized remover that permits five minutes of contact and requires immediate collection afterward. If application to one section finishes at 9:20 a.m., collection is due at 9:25 a.m. Starting a second section at 9:23 does not move the first section's deadline. A single timer labelled only cleaning can become ambiguous.
The five-minute period is invented, not an epoxy recommendation. Use the real label and any temperature restrictions. Complete one manageable area before expanding the workflow, especially on a vertical surface where runoff needs attention. If the job cannot be performed within the permitted conditions, arrange a specialist rather than allowing the product to remain while searching for cloths or a suitable brush.
Avoid cement-grout assumptions
A white-looking film does not establish cement chemistry. Acid formulated for cement residue may fail to address epoxy resin while affecting other materials nearby. An epoxy joint's chemical resistance also does not protect every tile, seam and trim from that acid. Select a method because it addresses the identified residue and assembly, not because a similar bottle worked in a different bathroom.
Do not add sealer as a way to make an epoxy joint easier to wipe unless the grout manufacturer explicitly requires a particular treatment. Many epoxy systems have different sealing needs from conventional cement grout. Equally, a product's resistance claims do not make it a substitute for waterproofing. Cracks, detached tiles and recurring moisture remain installation questions after the visible soil has been removed.
Finish with separate records for soil and residue
Inspect only after the cleaned area is fully dry. Check tile sheen, grout firmness, joints and lower runoff boundaries. No new tackiness, whitening, softened material or streaks should appear. Note the exact treatment, contact time and observed result rather than promising complete resin removal from a photograph.
For persistent installation haze, send the installer the product identification, grouting date and comparison images. Ask for a written compatible treatment or specialist assessment. Routine cleaning is complete when ordinary soil is removed safely; haze removal is complete only when the identified residue has been addressed without changing the installation. Keeping those endpoints separate prevents a resistant grout from becoming an excuse for uncontrolled chemistry.
THE REFERENCE FILE
Sources & scope
Documentation reviewed 1 Nov 2026. Examples are illustrative; this article does not claim hands-on product testing. Follow the instructions for your actual material, model and location.